Analysis of the Visually Detectable Wear Progress on Ball Screws
Paper and Code
May 02, 2022


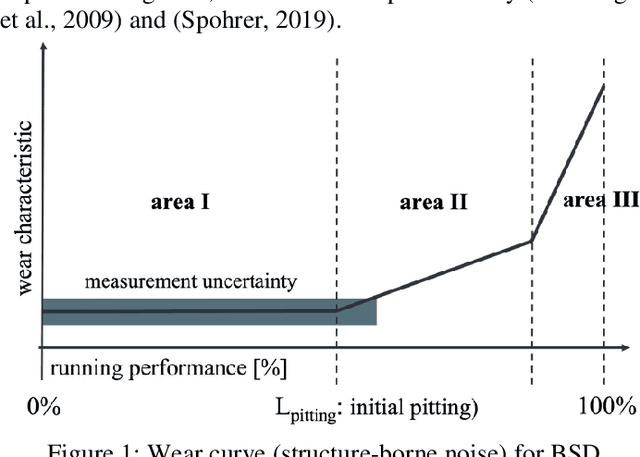
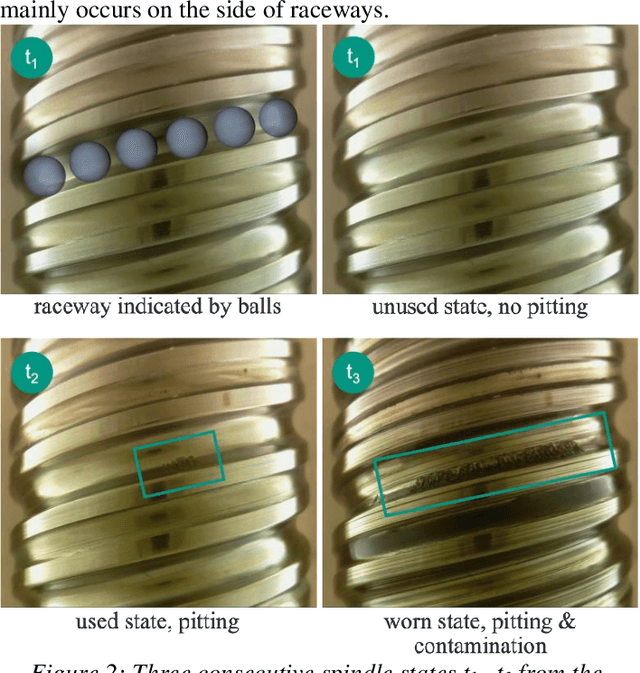
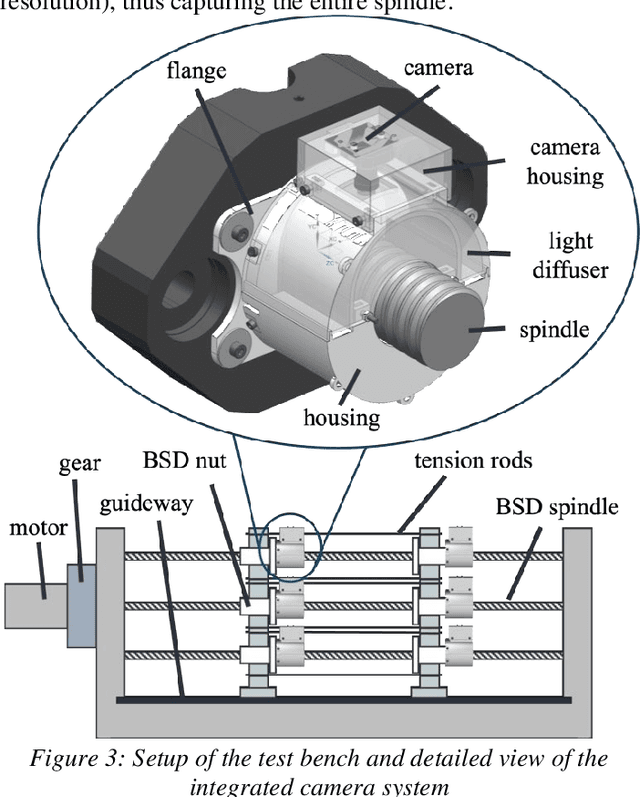
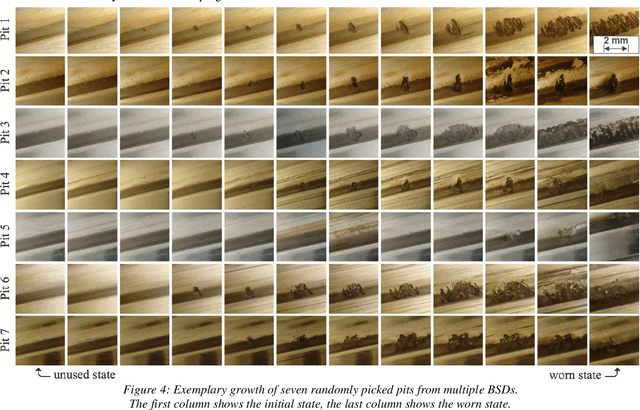
The actual progression of pitting on ball screw drive spindles is not well known since previous studies have only relied on the investigation of indirect wear effects (e. g. temperature, motor current, structure-borne noise). Using images from a camera system for ball screw drives, this paper elaborates on the visual analysis of pitting itself. Due to its direct, condition-based assessment of the wear state, an image-based approach offers several advantages, such as: Good interpretability, low influence of environmental conditions, and high spatial resolution. The study presented in this paper is based on a dataset containing the entire wear progression from original condition to component failure of ten ball screw drive spindles. The dataset is being analyzed regarding the following parameters: Axial length, tangential length, and surface area of each pit, the total number of pits, and the time of initial visual appearance of each pit. The results provide evidence that wear development can be quantified based on visual wear characteristics. In addition, using the dedicated camera system, the actual course of the growth curve of individual pits can be captured during machine operation. Using the findings of the analysis, the authors propose a formula for standards-based wear quantification based on geometric wear characteristics.
 Add to Chrome
 Add to Firefox
 Add to Edge