An inspection technology of inner surface of the fine hole based on machine vision
Paper and Code
Sep 15, 2023


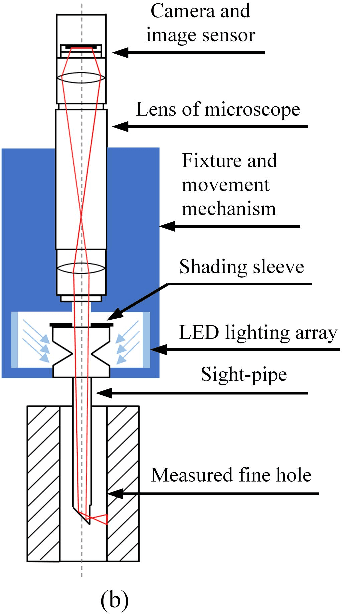
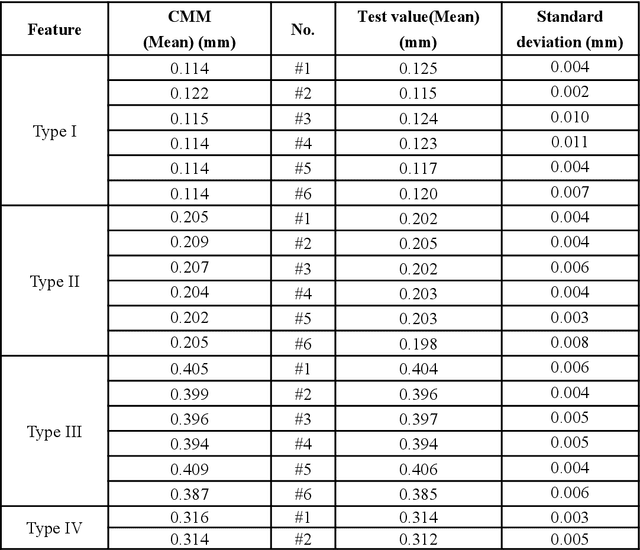
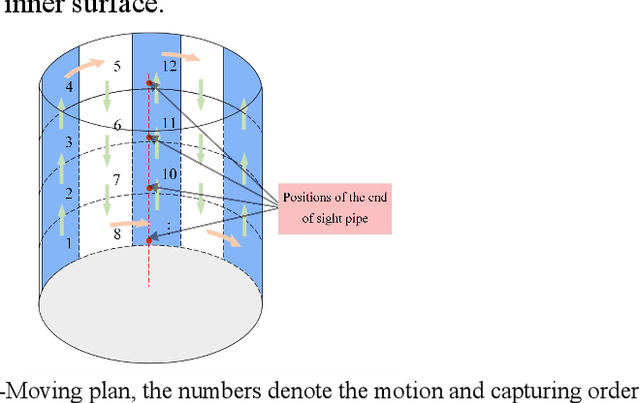
Fine holes are an important structural component of industrial components, and their inner surface quality is closely related to their function.In order to detect the quality of the inner surface of the fine hole,a special optical measurement system was investigated in this paper. A sight pipe is employed to guide the external illumination light into the fine hole and output the relevant images simultaneously. A flexible light array is introduced to suit the narrow space, and the effective field of view is analyzed. Besides, the arc surface projection error and manufacturing assembly error of the device are analyzed, then compensated or ignored if small enough. In the test of prefabricated circular defects with the diameter {\phi}0.1mm, {\phi}0.2mm, 0.4mm distance distribution and the fissure defects with the width 0.3mm, the maximum measurement error standard deviation are all about 10{\mu}m. The minimum diameter of the measured fine hole is 4mm and the depth can reach 47mm.
 Add to Chrome
 Add to Firefox
 Add to Edge